
Ski boots are the most important connection between you and your skis, but when they hurt, nothing else matters. Not the fresh snow, not the lift lines, not the $150 lift ticket. All you can think about is the throbbing in your toes, the bruise forming on your shin, or the pins-and-needles feeling that tells you blood isn’t getting where it needs to go.
If you’ve ever wondered, “Why do my ski boots hurt?” or asked yourself, “Are my ski boots too tight?”, you’re in good company. Boot pain is the single most common complaint I hear from skiers, and the frustrating part is that most of it is fixable.
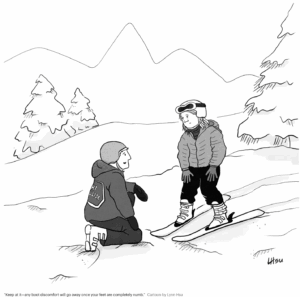
“Any boot discomfort will go away once your feet are completely numb.” – Actual advice found in a New Yorker article
Yeah, that’s not how this works. Let’s talk about what’s actually going on.
Why Do Ski Boots Hurt? The Real Causes
Here’s what I tell every skier who asks: boot pain almost always comes down to a mismatch between your foot and your boot. That sounds obvious, but the mismatch can show up in surprising ways. It’s not always “the boot is too small.” Sometimes the boot is the right length but the wrong width. Sometimes it’s the right width but the wrong volume. Sometimes the boot itself is fine but you’re buckling it wrong.
Let’s break down the most common culprits, because knowing which one you’re dealing with changes the solution entirely.
Your Boots Are Too Small (or Too Short)
This is the one everyone assumes, and it’s sometimes right. If your toes are curled, crushed, or jammed against the front of the boot from the moment you buckle up, the boot is probably too short. But here’s a nuance that trips people up: your toes should lightly touch or brush the front of the boot when you’re standing upright. When you flex forward into a skiing stance, your heel drops back into the heel pocket and your toes should pull away from the front. If they don’t, you’re genuinely too short on length.
The fix: Get your foot measured in Mondo sizing (centimeters, not the US/EU sizes your sneakers use) and compare against the shell’s internal length.
Your Boots Are Too Big (Surprisingly Common)
This one catches people off guard because a boot that’s too big doesn’t feel “too big” the way a floppy shoe does. Instead, it causes a chain reaction: your foot slides forward on each turn, your toes jam into the front, your heel lifts off the bottom, and you instinctively crank the buckles tighter to compensate. Now you’ve got a boot that’s simultaneously too loose (internally) and too tight (from over-buckling).
Too-big boots are the number one cause of shin bang, because the heel lift creates a gap between your shin and the tongue that slams shut every time you flex.
The fix: Do a shell fit test (more on that below). If you’ve got more than two fingers of space behind your heel with the liner removed, the shell is too big. A thicker insole or aftermarket liner might help a half-size mismatch, but a full size too big is a boot you should exchange.
Wrong Width for Your Foot Shape
Ski boots come in different last widths: typically 97-98mm for narrow feet, 100mm for average, and 102-104mm for wide feet. If you’ve got a wide forefoot stuffed into a 98mm race boot, you’re going to feel pressure on the sides of your foot no matter how perfectly the length matches.
But here’s something most sizing charts don’t tell you: that “100mm” measurement only applies at one Mondo size, usually 26.5. If you wear a size 24.5 in a “100mm last” boot, the actual width of the shell at your size is closer to 96-97mm. The width scales proportionally with length, but marketing doesn’t explain that. So a skier with a 100mm-wide foot in a size 24.5 might actually need a “102mm last” boot to get 100mm of actual internal width.
This is exactly why generic width recommendations fall short without knowing your specific foot dimensions. Wayfinder’s scan captures your foot width at the actual measurement point and matches it against how boots are sized at your specific Mondo size, not just the marketing number.
Poor Liner Fit
The liner is the soft inner boot that cushions your foot against the hard shell. Stock liners are built for a generic foot shape, and if your foot shape isn’t generic (whose is?), the liner can create pressure points the shell never intended.
The good news: liners pack out. The foam compresses with use, creating more room over time. A boot that feels snug on day one will feel noticeably roomier by day five. This is expected and normal. The bad news: if a liner has a pressure point on a bony area (like an ankle bone or the base of your fifth metatarsal), that pain usually doesn’t improve with pack-out because there’s bone pressing against foam with nowhere to go.
The fix: Heat-moldable liners can be baked and re-formed to your foot. Custom footbeds/insoles give your arch proper support (the stock insole in most boots is basically cardboard). For persistent bony pressure points, a bootfitter can add padding, reshape the liner, or punch the shell.
Buckle Technique (The Easiest Fix)
Sometimes boots don’t need replacing. They just need different buckling. A few common mistakes:
Over-tightening the instep buckle. The instep buckle (usually the second one from the bottom) sits directly over the dorsal artery, the main blood supply to your toes. Crank this one too tight and you’re cutting off circulation, which is why your toes go numb and cold. The instep buckle should be firm but not cranked. You should be able to slide a finger under it.
Ignoring the power strap. The wide Velcro strap at the top of the cuff fills the gap between your shin and the boot tongue. Using it properly means you can loosen the cuff buckles without losing performance, which improves circulation in your calf.
Buckling in the wrong order. Start with the toe buckle (lightest tension), then forefoot, then instep, then cuff, then power strap. Bottom to top, light to firm.
How Tight Should Ski Boots Actually Be?
One question I get all the time is how tight boots should feel. Here’s the scoop: “tight” is the wrong word. What you want is “secure.”
Heels locked down. Zero lift. When you flex forward, your heel should stay planted in the heel pocket. If it pulls up, the boot is too big, the liner is packed out, or you need a footbed to fill volume under the arch.
Toes brushing, not crushed. Standing upright, your toes should lightly touch or just barely brush the front of the boot. When you flex into a skiing stance, they should pull back. If your toes are curled at any point, the boot is too short. If there’s a full finger of space in front of your toes, it’s probably too long.
Firm but not painful. The boot should feel like a firm handshake around your whole foot. Snug, intentional, secure. Not painful. Not cutting off circulation. If you buckle up and immediately want to unbuckle, that’s not “performance fit,” that’s the wrong boot.
Able to flex. You should be able to flex your ankles forward against the cuff resistance. If the boot won’t flex at all, the flex is too stiff for your weight and ability. If it collapses with almost no effort, it’s too soft.
The New Boot Reality Check
On the first fit, your boot will feel significantly tighter than it will after a few days of skiing. Liners compress and mold to your foot. Most new boots pack out 3-5mm in the first 5-10 ski days, which is enough to make a boot that felt borderline-tight become comfortable.
So: wear new boots around the house for 15-20 minutes. Walk, flex, stand in a skiing stance. If you feel firm, even pressure without any specific “hot spots” or sharp pain points, you’re likely in the right range. Give the liner time to break in.
If you feel sharp pain over a bony area (ankle bone, bunion, sixth toe area) that wouldn’t be resolved by 3-5mm of liner compression, that’s a fit mismatch that won’t fix itself. Try a different boot, a different width, or consult a bootfitter.
For more detail on what to expect during the break-in process, we’ve got a dedicated guide.
The Shell Fit Test: How to Know for Sure
This is the single most useful diagnostic you can do at home or in a shop. It tells you whether the shell itself (ignoring the liner) has enough room for your foot.
Step 1. Remove the liner from the boot.
Step 2. Slide your foot into the bare shell wearing thin ski socks.
Step 3. Push your toes forward until they touch the front of the shell.
Step 4. Have someone check the space behind your heel.
Interpreting Your Results
One finger (roughly 15mm). Very aggressive, race-level fit. Only for expert skiers who have access to regular bootfitter tune-ups and prioritize maximum performance over comfort.
One and a half to two fingers (roughly 20-25mm). The standard performance fit for most intermediate-to-advanced skiers. Snug enough for precise control, enough room that it won’t be painful after liner break-in.
Two and a half to three fingers (roughly 25-30mm+). Comfort fit for beginners, or a boot that’s likely too big for anyone skiing aggressively. At this shell gap, your foot has room to move around inside the boot, which means less control, more fatigue, and higher likelihood of shin bang from heel lift.
More than three fingers. The boot is too big. A thicker insole or aftermarket liner can’t make up this much volume. You need a smaller shell.
For a more thorough pre-purchase assessment (including ankle flexibility testing that affects which boots work for your leg geometry), check out our guide on two tests every skier should do before buying boots.
When Sizing Charts Aren’t Enough
Here’s the part that frustrates skiers the most: you can do everything right, measure your Mondo size, pick the right last width, choose an appropriate flex, and the boot still doesn’t feel right. That’s because ski boot fit is three-dimensional, and sizing charts only cover one or two dimensions.
Your foot length tells you the Mondo size. The last tells you something about width (but only at one size, and only at one measurement point). Neither tells you about your instep height, your heel width, your arch shape, or how your ankle dorsiflexion affects which boots accommodate your stride. Two skiers wearing size 27.0 with 101mm-wide feet can need completely different boots because their instep heights are 5mm apart.
This is why a 3D scan matters. Wayfinder captures your foot’s full dimensional profile and matches it against how boots actually fit at your specific size, not just what the manufacturer’s spec sheet says. It takes about five minutes from your phone, and it replaces the guesswork with data.
Quick Reference: Fixing Common Boot Pain
| Pain Location | Most Likely Cause | First Thing to Try |
|---|---|---|
| Numb/cold toes | Instep buckle too tight, or boot too long | Loosen instep buckle one notch |
| Shin bang | Boot too big (heel lift) | Check shell fit, tighten power strap |
| Side-of-foot pain | Boot too narrow | Try a wider last or get shell punched |
| Arch pain | No arch support (stock insole) | Custom footbed or quality aftermarket insole |
| Ankle bone pain | Liner J-bar doesn’t match anatomy | Add padding or grind the shell at the pressure point |
| Top-of-foot pain | Instep too low for boot, or over-buckled | Loosen instep buckle; consider lower-instep boot |
| Blister on heel | Heel lifting, foot sliding | Tighten power strap, check if boot is too large |
Tips for Avoiding Boot Pain in the First Place
Measure late in the day. Your feet swell throughout the day. Afternoon measurements are more representative of your foot size while skiing.
Wear thin, ski-specific socks. One pair. Not two. Thick socks take up volume, reduce circulation, and paradoxically make your feet colder. A single thin merino or synthetic ski sock is what every bootfitter recommends.
Forget your shoe size. Your US 10 in running shoes has no relationship to your ski boot size. Mondo sizing is a different system entirely.
Don’t assume wider is better. If your feet hurt, the instinct is to go wider. But a boot that’s too wide lets your foot slide laterally, creating friction, blisters, and fatigue. You want the right width, not just more width.
Give new boots time. Plan for a break-in period of 3-5 ski days. Wear them around the house first. Here’s what to expect.
If pain persists, get help. Some fit issues genuinely need hands-on bootfitter expertise: shell punching, canting, custom footbeds. Not everyone has a great bootfitter nearby (there are maybe two in the entire Bay Area, and appointments book out weeks in advance). But for getting the right boot in the first place, starting with your actual foot data eliminates the biggest source of error.
👉 Get your personalized boot recommendations
Related Reading
- Best Ski Boots 2025/2026
- Complete Anatomy of a Ski Boot
- Ski Boot Binding Compatibility Guide
- Women’s Ski Boots: What’s Actually Different
- Shin Bang in Ski Boots: Why Your Shins Hurt and What Fixes It
- Ski Boot Liners Explained: Stock, Heat-Moldable, and Custom
- Ski Boot Last Width Explained: 98mm vs 100mm vs 102mm
- How to Break In New Ski Boots
- Two Tests Every Skier Should Do Before Buying Boots
- Ski Boot Flex: What Rating Should You Get?
- Ski Boots for Wide Feet: The 2026 Fit Guide
Last updated: February 2026
Your Digital Ski Bootfitter
Fit problems are almost always solvable, if you start with the right data.
Wayfinder scans your feet and matches you to boots in the right volume, width, and length for your exact foot shape. Free, 5 minutes, no appointment.
✓ 5 minutes
✓ Just your phone
✓ Millimeter accuracy
Bruce Botsford is a certified bootfitter and the founder of Wayfinder, a digital bootfitting company using 3D foot scanning technology to help skiers find properly fitting boots online. Before launching Wayfinder, Bruce spent over a decade in operations and supply chain roles at Coca-Cola, Apple, and autonomous vehicle companies including Cruise and Aurora. He holds an MBA in Operations Management from Northwestern’s Kellogg School of Management and a BA from the University of Virginia. Bruce founded Wayfinder after experiencing firsthand how difficult it is to find well-fitting ski boots without access to an expert bootfitter, and he’s on a mission to make great boot fit accessible to every skier.
