You just dropped $700 on a pair of ski boots. You know they have buckles, a hard shell, and some kind of soft thing inside. Beyond that? Most skiers couldn’t name a single component of the gear they trust to transfer every turn, every bump, every hard stop down the mountain.
And honestly, that’s fine for most days on the hill. But the moment something feels off, the moment your shin screams on every flex or your toes go numb by the third run, understanding what’s actually going on inside that boot is the difference between fixing the problem and throwing money at the wrong solution.
This guide breaks down every major ski boot component, what it does, and (this is the part most anatomy guides skip) which parts actually matter for your comfort and fit.

Table of contents
- What Are the Four Main Parts of a Ski Boot?
- The Shell: Why Does the Plastic Matter So Much?
- What Does the Closure System Actually Do?
- What’s Inside the Liner (And Why Should You Care)?
- What Sole Standard Does Your Boot Use (And Why Does It Matter)?
- What About Walk Mode, Flex Adjustment, and Canting?
- Which Components Actually Affect Your Fit?
- Ski Boot Glossary: Quick Reference
- Taking Care of Your Boots (So They Take Care of You)
- Frequently Asked Questions / FAQ
- Where to Go from Here
What Are the Four Main Parts of a Ski Boot?
At the simplest level, every alpine ski boot has four major systems:
- Shell: the rigid plastic outer structure
- Liner: the soft inner boot that touches your foot
- Closure system: buckles, straps, BOA dials, or some combination
- Sole: the bottom surface that locks into your bindings
Each of these has sub-components that affect how the boot fits, flexes, and performs. Let’s work through them.
The Shell: Why Does the Plastic Matter So Much?
The shell is the hard exoskeleton that makes a ski boot a ski boot. It’s why you walk like a robot in the parking lot. But not all shells are created equal, and the type of plastic your shell is made from affects everything: how the boot flexes, how it handles cold temperatures, and how easily a bootfitter can modify it if something doesn’t fit right.
Lower Shell
The lower shell wraps around your foot from the ankle down. Here’s what’s going on in there:
Shell body. The main plastic structure surrounding your foot. This is where shell material matters most. Polyurethane (PU) is the standard for mid-to-high-end boots because it flexes progressively, meaning the harder you push, the more it pushes back. Think of it like good car suspension. Entry-level boots often use polypropylene (PP), which is lighter and cheaper but flexes in a more “on/off” way and is notoriously difficult for bootfitters to modify. Touring boots increasingly use polyamide (Grilamid), which is incredibly light and temperature-stable but has a springier, snappier feel that some alpine purists don’t love.
Toe box. The front section housing your toes. Some toe boxes are spacious, others are tight and performance-oriented. Here’s something most people don’t realize: two boots with the same last width (say, 100mm) can have completely different toe box shapes. One might feel roomy up front while the other squeezes your pinky toe. The last measurement is taken at the ball of the foot, not the toes.
Heel pocket. This is the shaped area at the back of the shell that cups your heel. A well-designed heel pocket keeps your heel locked down, which is critical for control. Heel lift (your heel pulling away from the boot when you flex forward) is one of the most common fit problems I see, and it usually traces back to either a shell that’s too big or a heel pocket that doesn’t match your anatomy.
Instep area. The top of the lower shell over your arch and midfoot. This area takes a lot of pressure when you buckle up, and it’s where circulation issues usually start. If your feet go numb 20 minutes into skiing, the instep is the first place to investigate. Additionally, if you habitually have cold feet even in reasonable temperatures, instep pressure is frequently the issue as it impacts normal circulation.
Upper Shell (Cuff)
The cuff extends from your ankle to mid-calf. It controls forward flex (how you lean into turns) and lateral support (how the boot holds your leg side-to-side).
Cuff body. The main structure wrapping your lower leg. Cuff height and shape vary a lot between models, and if you have muscular calves or a shorter lower leg, the wrong cuff shape can cause shin bang or calf pressure before you even get to the chairlift.
Cuff hinge/pivot points. Where the cuff connects to the lower shell. This is the mechanical joint that allows you to flex forward while keeping the boot rigid laterally. Traditional boots have a single pivot point. The Lange Shadow series uses a dual-pivot design that changes how force is distributed, making the boot feel more progressive and less jarring.
Spine. The structural backbone at the rear of the boot, connecting cuff to lower shell. On some boots (like the Lange Shadow or Dalbello IL Moro), the spine houses flex adjustment mechanisms, so you can stiffen or soften the boot without tools.
Spoiler. A removable or integrated wedge at the back of the cuff. Adding or removing spoiler material changes your forward lean, which affects your skiing stance. More forward lean pushes you into a more aggressive position. Less gives you a more upright, relaxed feel. Some boots come with interchangeable spoilers so you can experiment.
How Does Shell Material Affect Fit and Modification?
This is where it gets practical. If you’re buying boots and think you might need shell work down the road (punching out a bunion, grinding down a pressure point), the plastic type matters:
| Material | How It Flexes | Cold Weather Behavior | Can a Bootfitter Modify It? |
|---|---|---|---|
| Polyurethane (PU) | Progressive, damp | Stiffens noticeably in cold | Yes, grinds and punches well |
| Polyamide (Grilamid) | Springy, snappy | Very temperature-stable | Possible, but requires precise heat |
| Polypropylene (PP) | Linear, “dead” feel | Moderate stiffness change | Difficult. Prone to melting |
| Carbon-reinforced | Maximum stiffness | Varies | Extremely limited |
Here’s a real-world example of why this matters: a PU boot that feels perfect in a warm shop can become noticeably stiffer on a 10°F morning. If you’re choosing between two boots and one is PU and the other is Grilamid, and you ski primarily in bitter cold, that temperature stability might matter more than you’d think.
What Does the Closure System Actually Do?
The closure system is how you secure your foot and leg inside the shell. It sounds simple, but the differences between closure types affect pressure distribution, convenience, and even performance.
Traditional Buckles (3-4 Buckle System)
Still the most common setup on alpine boots. Here’s what each piece does:
Lower buckles (instep buckles). Usually two buckles across the forefoot and instep. These secure the lower shell around your foot. The instep buckle is the one most people overtighten, which compresses the blood vessels on top of your foot and causes numbness and cold toes. If your feet go numb, try loosening this one notch before blaming the boot.
Upper buckles (cuff buckles). One or two buckles on the cuff securing your lower leg. These affect how the cuff transmits your movements to the ski. Too loose, and there’s a delay between what your leg does and what the ski does. Too tight, and you restrict blood flow to your lower leg.
Micro-adjust. The small screw mechanism on the catch (the hooked part that ‘catches’ the teeth). This lets you fine-tune closure in smaller increments than the buckle teeth alone. Most skiers never touch these, but they’re incredibly useful for dialing in fit between “too tight” and “too loose.”
Power strap. The wide Velcro strap at the top of the cuff. This might be the most underrated component on the entire boot. Proper power strap tension fills the gap between your shin and the tongue, improving energy transfer and reducing shin bang. If you’re not using your power strap, you’re leaving performance on the table.
BOA Closure System
BOA has been a common in snowboarding for years, and it’s now making serious inroads in alpine skiing. Instead of buckles, a BOA system uses a rotating dial that tightens steel cables running through guides on the shell.
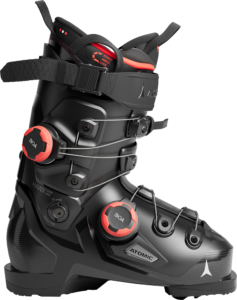
How it works. Turn the dial, the cables tighten. Click it to release. The key advantage is even pressure distribution: instead of buckles pushing down on specific spots, the cable wraps around the shell more uniformly. Personally, I thought this was more marketing than reality until I started demo’ing BOA boots and admit there is more here than just marketing fluff. The Atomic Hawx Ultra 130S Dual BOA uses separate dials for the lower shell and cuff, so you can adjust each independently
Single vs. Dual BOA. Single-dial boots control the whole boot with one adjustment. Dual-dial gives you independent control over the lower shell and cuff. For most skiers, dual BOA offers noticeably better fit customization.
The trade-off. Some skiers also prefer the tactile feedback of traditional buckles. But for anyone who’s struggled with pressure points from buckle placement, BOA is worth trying. The entire system is intended to be replaceable in the rare event the cable breaks.
Hybrid Systems
Some manufacturers combine both: BOA on the lower shell for pressure distribution, traditional buckles on the cuff for familiar adjustability (or vice versa). Salomon’s EXOWRAP ecosystem is a good example, using BOA cables to “wrap” the shell around the foot rather than crushing down from above.
What’s Inside the Liner (And Why Should You Care)?
The liner is the soft inner boot that your foot actually touches. If you’ve ever pulled the liner out of a shell, you know it looks like an oversized slipper. But the liner plays a huge role in comfort, warmth, and how precisely the boot transmits your movements.
Why the Stock Liner Is Usually the Weak Link
Here’s the uncomfortable truth: the liner that comes with your boot is a compromise. Manufacturers spend most of their R&D budget on the shell and closure system. The stock liner is designed to be “good enough” for the widest range of foot shapes, which means it’s not optimized for anyone in particular.
That said, stock liners have improved dramatically in recent years. Heat-moldable stock liners (where you bake them in an oven and they conform to your foot shape) are now common even on mid-range boots. They’re not as precise as aftermarket options, but they’re a huge step up from the foam liners of ten years ago.
For a deeper look at liner types and when upgrading makes sense, check out our complete liner guide.
Liner Types at a Glance
| Type | What It Is | Best For | Approximate Cost |
|---|---|---|---|
| Stock liner | Comes with boot | Most skiers starting out | Included |
| Heat-moldable | Softens with heat to conform | Custom-ish fit without full custom | Included in many mid/high-end boots |
| Intuition foam | Premium aftermarket heat-moldable | Skiers wanting better fit and warmth | $200-$350 |
| ZipFit | Cork-based, injectable | Maximum customization, refillable | $350-$500 |
| Foam injection | Liquid foam injected around foot | Severe fit issues, medical needs | $300-$500 |
Liner Components That Matter for Fit
J-bars. Padding around the ankle bones. If your ankle bones rub against the boot, it’s usually because the J-bar padding is insufficient or positioned wrong for your anatomy. A good bootfitter can add or reshape J-bar material without replacing the whole liner.
Tongue. The front piece that sits over your instep. Tongue thickness and stiffness affect how much pressure you feel when you flex forward. Some liners have a separate tongue that can be replaced independently; others integrate the tongue into the liner body.
Liner closure. Many liners have their own lace, Velcro, or elastic closure to snug the foot before you step into the shell. This internal closure helps lock your heel in place and reduces the amount of work the shell buckles have to do.
What Sole Standard Does Your Boot Use (And Why Does It Matter)?
The sole is where your boot meets the binding, and getting this wrong isn’t just uncomfortable, it’s a safety issue. If your boot sole isn’t compatible with your binding, the binding can’t release properly in a fall.
The Three Main Standards
| Standard | Common Name | What It Looks Like | Works With |
|---|---|---|---|
| ISO 5355 | Alpine | Flat bottom, hard plastic | Traditional alpine bindings |
| ISO 23223 | GripWalk | Slightly rockered, rubber tread | GripWalk-compatible bindings |
| ISO 9523 | Touring | Rockered, rubber tread, often with tech inserts | Touring/pin bindings and some alpine bindings |
GripWalk has become increasingly popular because it makes walking in ski boots significantly less miserable (rubber tread instead of slick plastic). But you need a GripWalk-compatible binding. Most modern bindings can now handle both alpine and GripWalk soles, but if your bindings are more than a few years old, double-check before buying.
Tech inserts are the small metal fittings in the toe (and sometimes heel) of touring boots that engage pin-style bindings. These aren’t a sole type on their own, but they’re often added to touring soles.
For the full breakdown on which soles work with which bindings, see our Binding Compatibility Guide.
What About Walk Mode, Flex Adjustment, and Canting?
These are features you’ll find on some boots but not others. Whether they matter to you depends on how and where you ski.
Walk Mode
Found on touring boots and many all-mountain crossover models. A lever or switch on the spine or cuff releases the upper cuff so it can pivot freely, giving you a more natural walking stride for hiking or walking around the lodge. When it’s time to ski, you lock the cuff back into a fixed position.
If you split your time between resort skiing and any amount of uphill travel, walk mode is essentially a requirement. If you’re 100% resort, you probably don’t need it. On a resort day I find myself rarely if ever even considering using walk mode even at apres or while trudging through the parking lot.
Flex Adjustment
Some boots let you change the stiffness without visiting a bootfitter. Common methods include removing spine screws (which softens the boot) or swapping flex plates. The Phaenom FR-01 offers adjustable forward lean, and several Dalbello models have been doing removable-spine flex adjustment for years.
For a full explanation of what flex ratings mean (and why a “130” from one brand can feel nothing like a “130” from another), check out our Flex Guide.
Canting and Cuff Alignment
Cuff alignment tilts the upper cuff laterally to accommodate bow-legged or knock-kneed skeletal structures. Most performance boots have an adjustment screw at the cuff pivot that allows 1-3 degrees of tilt in either direction. This is one of the most overlooked adjustments in skiing: if you can’t get your skis flat on the snow despite good technique, cuff alignment might be the issue.
Canting is different from cuff alignment. Canting involves physically modifying the boot sole to change the edge angle of the ski. It’s a more invasive modification done by a professional bootfitter.
Which Components Actually Affect Your Fit?
This is the table worth bookmarking. When something hurts or feels off, it helps to know which component is the likely culprit:
| What You’re Feeling | Likely Component | What’s Probably Happening |
|---|---|---|
| Pain on the sides of your toes | Shell width (last) | Boot is too narrow for your forefoot. May need a wider boot or shell punch. |
| Heel lifting when you flex forward | Heel pocket + liner | Boot is too big, or liner is packed out. Shell fit test will reveal which. |
| Shin pain (aka shin bang) | Cuff shape + boot volume | Boot may be too large. Heel is lifting and shin slams forward. See our shin bang guide. |
| Numb toes or cold feet | Instep buckle + boot volume | Instep buckle is too tight, compressing blood vessels. Or boot is too long and you’re overtightening to compensate. |
| Hot spots at buckle points | Buckle placement + shell shape | Buckle hardware is pressing on a bony spot. Padding or buckle repositioning can help. |
| Boot feels like it collapses, no support | Flex too soft | You need a stiffer boot for your weight and skiing style. See flex guide. |
| Boot won’t flex, feels like a cast | Flex too stiff (or cold PU) | Boot may be too stiff, or PU plastic is stiffening in cold temps. |
| Boot won’t snap into binding | Sole compatibility | Wrong sole standard for your bindings. Check our compatibility guide. |
Here’s the thing: this chart is useful for narrowing down the problem, but it still requires knowing your actual foot dimensions to solve it. A boot that feels “too narrow” might actually be the right width but the wrong length (too long, causing your foot to slide forward and press against the sides). Without knowing your foot’s length, width, and instep height, you’re guessing.
That’s exactly what Wayfinder’s 3D foot scan captures: the specific dimensions of your feet so boot recommendations are based on your anatomy, not just a size chart.
Ski Boot Glossary: Quick Reference
Here’s every term you’ll encounter when boot shopping, with a one-line explanation of why each one matters:
BSL (Boot Sole Length). Length of the sole in millimeters. Your binding tech needs this number to adjust release settings correctly. It’s printed on the boot, usually on the heel.
Canting. Physical modification of the boot sole to change ski edge angles. If you’ve plateaued at intermediate despite solid technique, alignment issues (including canting needs) could be the reason.
Cuff. The upper portion wrapping your lower leg. Cuff fit affects shin comfort, calf comfort, and how efficiently your leg movements translate to ski movements.
DIN. Release setting on bindings. Not a boot component, but your boot’s BSL determines the correct DIN range.
Flex index. Numerical rating indicating boot stiffness. The catch: there’s no industry standard, so a “130” varies wildly between brands.
Forward lean. The forward angle of the cuff. More lean puts you in a more aggressive, forward stance. Adjustable via spoilers or screw mechanisms on many boots.
GripWalk. Rockered rubber soles for improved walking. Requires compatible bindings, but most modern bindings handle them.
Heel pocket. The shaped area of the shell holding your heel. A secure heel pocket is the foundation of good ski boot fit.
Instep. The top of your foot between ankle and toes. The single most common pressure point in ski boot fitting.
J-bar. Padding around ankle bones in the liner. Often the first thing a bootfitter will adjust if your ankle bones are sore.
Last. Interior width of the boot at the forefoot, in millimeters. This number only applies at one specific Mondo size (usually 26.5), so it’s a starting point, not an absolute measurement of how wide the boot will feel on your foot.
Liner. The removable soft inner boot. Arguably the most important component for day-to-day comfort and the easiest to upgrade.
Mondo size. Boot length in centimeters. More precise than US/EU sizing, but still only one dimension of fit.
Overlap vs. Cabrio. Two shell designs. Overlap (upper wraps over lower) is most common for alpine. Cabrio (separate tongue piece) is common in freestyle boots.
Power strap. Wide Velcro strap at the top of the cuff. Use it. Seriously. It fills the gap between your shin and the tongue and dramatically improves energy transfer.
Ramp angle. The height difference between heel and toe inside the boot. Affects your natural stance and balance point. Not something most skiers need to think about, but bootfitters adjust it when fine-tuning stance.
Tech inserts. Metal fittings for pin binding compatibility on touring boots. Essential for backcountry setups.
Volume. The overall interior space combining width, instep height, and heel room. Two boots with the same “last” can have very different volumes.
Walk mode. Mechanism releasing the cuff for hiking. Essential for touring, nice-to-have for resort skiers who walk a lot.
Taking Care of Your Boots (So They Take Care of You)
Quick maintenance keeps your boots performing season after season:
Shell. Dry at room temperature (never with direct heat, which can warp PU plastic). Inspect for cracks before each season, especially at the cuff hinges. Store with buckles loosely engaged so the plastic doesn’t deform.
Liner. Pull liners out after every ski day to dry. Air dry only, never machine dry. Boot dryers designed for ski equipment (like DryGuy or Peet) are worth the $30-$50 investment. Replace liners when the foam no longer bounces back: typically around 80-150 ski days depending on liner quality.
Sole. Inspect toe and heel lugs for wear, especially if you walk on pavement in your boots (GripWalk soles handle this much better than alpine soles). Worn lugs affect binding engagement and release, which is a safety issue.
Buckles. Lubricate pivot points annually. Carry a spare buckle kit for multi-day trips.
Frequently Asked Questions / FAQ
Every ski boot has four major systems: the shell (the rigid plastic outer structure), the liner (the soft inner boot your foot actually touches), the closure system (buckles, powerstrap, or BOA), and the sole (the bottom surface that locks into your bindings). Each system has sub-components that affect fit, flex, and performance differently.
The lower shell wraps around your foot from the ankle down and determines width, toe box shape, and heel pocket fit. The cuff is the upper portion that wraps your lower leg and controls forward flex and lateral support. They connect at the cuff pivot points, which is the mechanical joint that lets you flex into turns while staying rigid side-to-side.
The power strap is the wide velcro strap at the top of the cuff, and it’s one of the most underused components on the boot. Proper tension fills the gap between your shin and the tongue, improving energy transfer and significantly reducing shin bang. If you’re skiing with your power strap loose or ignored, you’re leaving real performance on the table.
Last width is a single measurement at the widest point of the forefoot, in millimeters. Volume is the total interior space of the boot, combining width, instep height, and heel room. Two boots with the same last width can have very different volumes. A narrow, high-volume boot and a wide, low-volume boot might share a 100mm last but fit completely differently on the same foot.
It matters a lot, because the wrong sole can prevent your binding from releasing correctly in a fall. The three main standards are ISO 5355 (traditional flat alpine sole), GripWalk (slightly rockered with rubber tread, much better for walking), and ISO 9523 (touring sole, often with tech inserts for pin bindings). Most modern bindings handle both alpine and GripWalk, but check your bindings before buying GripWalk boots if they’re more than a few years old.
Knowing the parts gets you most of the way there. Heel lift usually traces to either a too-big shell or a packed-out liner. Numb toes usually come from the instep buckle being over-tightened. Shin bang usually points to excess volume in the shell. But anatomy only tells you what’s causing the problem. Solving it still requires knowing your actual foot dimensions, because the same symptom in two different skiers can have two different root causes.
Where to Go from Here
Your Digital Ski Bootfitter
Now that you know what’s in a ski boot, find one that fits yours.
Wayfinder’s 3D scan measures your foot in millimeters and matches you to boots from Atomic, Tecnica, Salomon, Nordica, and more.
✓ 5 minutes
✓ Just your phone
✓ Millimeter accuracy
Related Guides
- How to Break In New Ski Boots
- Women’s Ski Boots: What’s Actually Different
- Ski Boot Last Width Explained: 98mm vs 100mm vs 102mm
- Ski Boot Flex: What Rating Should You Get?
- Ski Boot Liners Explained: Stock, Heat-Moldable, and Custom
- Ski Boot Binding Compatibility Guide
- The Most Exciting Ski Boots for 2025/2026
- Shin Bang: Why Your Shins Hurt and What Fixes It
- When to Replace Your Ski Boots
External Resources
- Materials, Designs and Standards Used in Ski-Boots for Alpine Skiing (Research Paper)
- Blister Review: Deep Dive on Ski Boot Plastics (Podcast)
Bruce Botsford is a certified bootfitter and the founder of Wayfinder, a digital bootfitting company using 3D foot scanning technology to help skiers find properly fitting boots online. Before launching Wayfinder, Bruce spent over a decade in operations and supply chain roles at Coca-Cola, Apple, and autonomous vehicle companies including Cruise and Aurora. He holds an MBA in Operations Management from Northwestern’s Kellogg School of Management and a BA from the University of Virginia. Bruce founded Wayfinder after experiencing firsthand how difficult it is to find well-fitting ski boots without access to an expert bootfitter, and he’s on a mission to make great boot fit accessible to every skier.
